SumRndmDde's Character Creator-EX plugin: F.A.Q's

● ARCHIVED · READ-ONLY
Started by Rhino 113 posts Page 2 of 6 View original ↗
  1. Zayriel said:
    I followed both the install and troubleshooting instructions for CCEX, and can't seem to get it to work. I'm currently using the latest build version of MV, and also have the Super Tools Engine plugin installed, which seems to not recognize that CCEX is installed and active. Can anybody please help me with this issue?

    I am having the same issue. :kaoeh:
  2. My game is really good open world, and a character creator would help me.
    I know how to install SRDude EX plugin, but idk how to add your part to the creator. Can you help me? plz its urgent
  3. Hey fellas,

    everything works except for one thing and I dont know how to fix it.
    Somehow the text doesn't get the shoving in the right spot and is written right over the custom avatar.
    I'm using the following code in the text box.

    <CC Face:1>
    Blabla!
    \N<\P[1]>

    Somebody has an idea? Didn't get the click..
  4. Pamster said:
    Hey fellas,

    everything works except for one thing and I dont know how to fix it.
    Somehow the text doesn't get the shoving in the right spot and is written right over the custom avatar.
    I'm using the following code in the text box.

    <CC Face:1>
    Blabla!
    \N<\P[1]>

    Somebody has an idea? Didn't get the click..

    Pamster, how were you able to get it to work?
  5. I've downloaded the sample.zip on the site as a preset. I was too lazy to create every folder manually. :D

    I also fixed my problem. Reading is the key. As explained in the help.doc, just place a random avatar in the text box. It will be overwritten with the <cc face:x> command.
  6. Pamster said:
    I've downloaded the sample.zip on the site as a preset. I was too lazy to create every folder manually. :D

    I also fixed my problem. Reading is the key. As explained in the help.doc, just place a random avatar in the text box. It will be overwritten with the <cc face:x> command.

    Can you please tell me where you downloaded the sample zip from?
  7. Just click on the Link Rhino posted where you can download the plugin. Scroll down a bit and click on [Sample Images]. You can find Rhinos' Ressource Pack there too.
  8. Oh snap, that actually worked! Thanks a lot, Pamster! :thumbsup-left::thumbsup-right:
  9. Okay, so.. I've tried everything I think of, and I don't know why it isn't working? I've tried reading up on it but I just.. I just can't get it to work, and I know it'll be for some silly little reason, but, if anyone could help that would be really appreciated.

    Apologies for the large images, but I figured it was best to just show you everything at once.

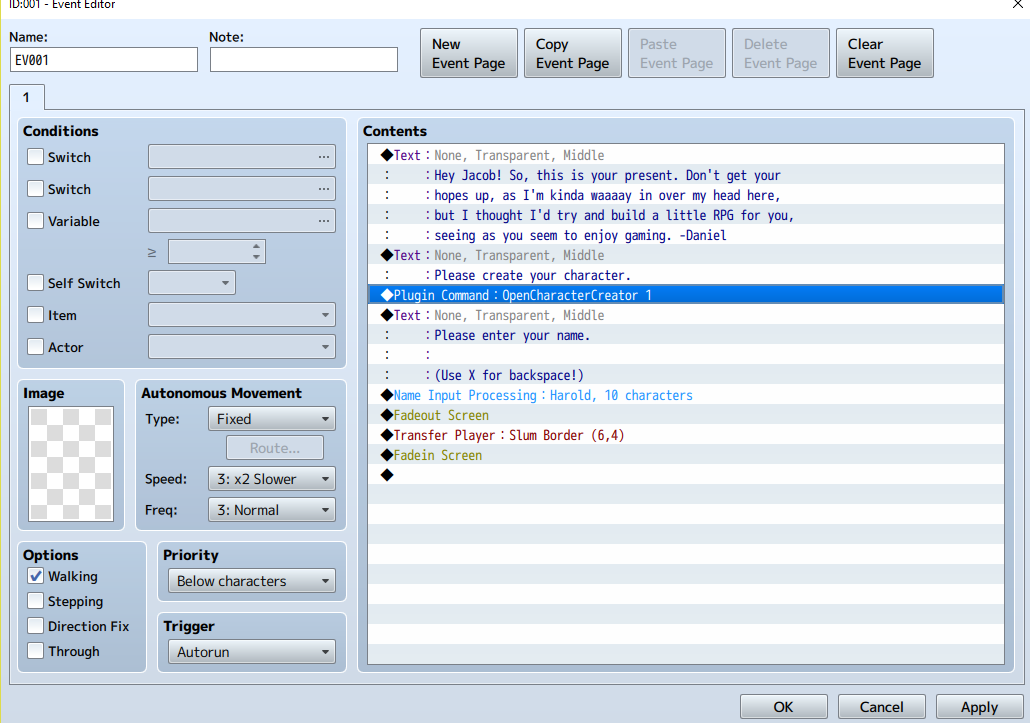
    Here's the coding of the event. (It's set to autorun, and the text beforehand appears fine so the event is definitely starting, but it just skips over the OpenCharacterCreator instruction)
    wsDudH5
    Intro1.PNG
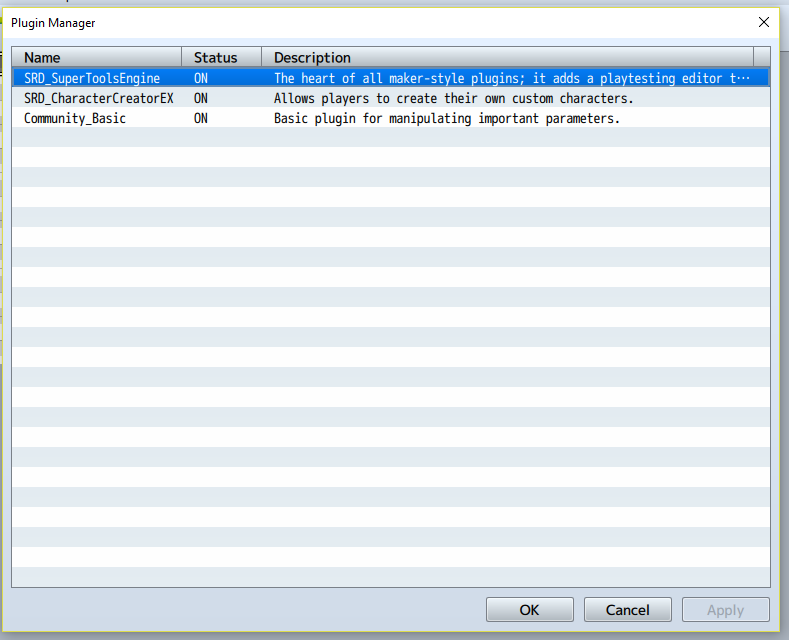
    Here's my plugins, the supertools engine is above all others, and both that and the character creator were installed today so I do have the most up to date versions of everything.
    ywvOCpl
    Intro2.PNG

    Here you can see the folder format I have in the game, I downloaded the exact zip folder with the sample images provided (though changed the background to plain black).
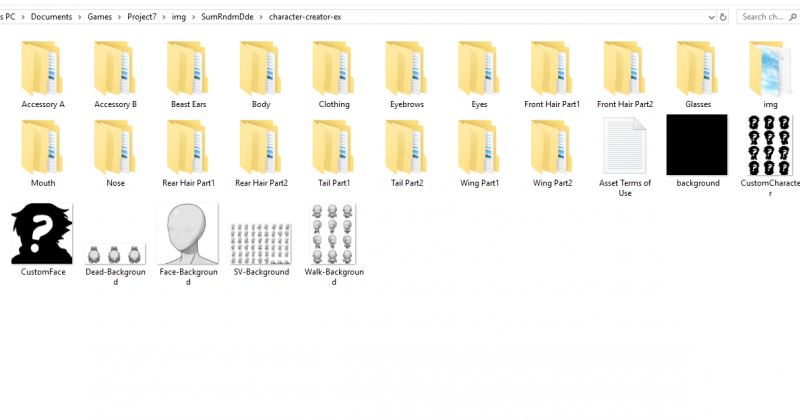
    Intro3.PNG
    And finally, my version of RPG maker MV: looking at your troubleshooting FAQ this was another potential problem, but it shouldn't be seeing it is after the 1.3 version. I deleted and recreated the entire project today so I know this game/project is also 1.3+
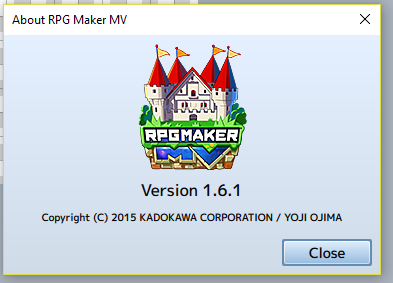
    Intro4.PNG
  10. Hey @Onism. Did you try setting things up with an "Action Button" trigger?
  11. Zayriel said:
    Hey @Onism. Did you try setting things up with an "Action Button" trigger?

    I tested it just now, and this doesn't seem to effect the results. Like when it autoruns, the text shows before, and the text shows after, but for some reason the charactercreator doesn't open... :/
  12. Weird...I was having the same issue until I followed Pamster's advice by replacing my manual folder format of CCEX with the "sample images" folder download (no changes).

    Though, I did notice that after making some changes to a duplicate version of the "sample" folder, and replacing the working version with the duplicate, the plugin stopped working for me. All I had to do to get it working again was swap it out for the "sample" folder.
  13. Zayriel said:
    Weird...I was having the same issue until I followed Pamster's advice by replacing my manual folder format of CCEX with the "sample images" folder download (no changes).

    Though, I did notice that after making some changes to a duplicate version of of the "sample" folder, and replacing the working version with the duplicate, the plugin stopped working for me. All I had to do to get it working again was swap it out for the "sample" folder.

    Interesting, this worked! Clearly I had entered everything correctly, but even attempting to change the background resulted in the code not working- as when I replaced the character creator folder with just the downloaded sample files version with no alterations, it worked fine!

    Thank you Zayriel <3 <3 <3
  14. Sweet! So glad that I could help! :)
  15. I am wondering if you can set a custom character without going into the creation screen as I just wanted this for the dynamic actors to show different accessories equipped, or is there a way for me to use dynamic actors without a custom character I cant get it to work if its not a custom character.
  16. Rhino said:
    To get the plugin to work with encrypted images, you need to edit it. Find the lines 527 – 528 that state
    Code:
    if(!stat.isDirectory() && _.isImageFile(files)) {
    const f = files.replace(‘.png’, ”);
    and
    _.isImageFile = function(filename) {
    return !!(filename.match(/\.png/i));
    And change ‘.png’ to ‘.rpgmvp’

    Two things to add with this note: 1) The lines of code before the word "and" now read:

    Code
    if(!stat.isDirectory() && _.isImageFile(files)) {
    const f = files.replace('.png', '');


    2) The lines of code that follow the word "and" are a tad further down the script on lines 570 - 571. This omission was no fault of Rhino. I found the post on SRDude's blog which she quoted this from directly.
  17. hey guys. how on earth does the custom color funciton work? I've been trying to change the default colors in the super tools engine for a few hours and I've made no progress. Changing the hue literally does nothing to the colors, changing saturation from -1 to 0 makes them totally gray and from 0 to 1 inverts the color to the opposite of -1, which makes no sense.

    Just changing the default ["white",0] being changed to ["white",100] or ["white",200] or ["white",360] does absolutely nothing at all for skin tone. I'm trying to get the colors to go from light skin (not printer paper white) to pretty dark, but still clear on a black background.

    It seems the only thing that works as intended is brightness. Changing hue from 1 to 0 changed the color from brown to blue, also, which is extremely confusing.

    Please, help!
  18. Is there a good way to change individual part values without opening the actual menu? For example, if I wanted to allow a player to choose a "sample" NPC which they would just copy the CustomCharacter values of. I looked through the plugin, but I am still new to JS (used to more structured languages) and couldn't find anything that looked like what I needed.
  19. Abiciendi said:
    Is there a good way to change individual part values without opening the actual menu? For example, if I wanted to allow a player to choose a "sample" NPC which they would just copy the CustomCharacter values of. I looked through the plugin, but I am still new to JS (used to more structured languages) and couldn't find anything that looked like what I needed.
    This is something I had to figure out. You can do this in the following manner:

    In the plug-in's base parameters, turn the line that says output results to console on. Then make a debug event that allows you to open the character creation menu in-game. Then open playtest. Then put together the pieces that you don't want determined by your actor's class together in the character creation menu using the debug event you've created. When you finish, press F8 to go to your console, there should be a long line of output. Copy and paste this output into a script. Now you have a script that will change the base character's appearance without having to go through the character creation menu. You can create a script this way for each change you have, or you can edit the script you already made to refer to different files.