@Guardinthena I don't think I was trying to get it to handle independent items when I was writing this-- this wasn't really meant to be used with Yanfly's Shop Core haha. I'll add this to my to-do to investigate though
:)
@cokes1999 here's a demo:
http://s000.tinyupload.com/index.php?file_id=90814997831895173852
The demo appears to be down, is there a working link for this available anywhere? Awesome plugin and fits my needs just about perfectly.
-
After working with this for a little bit, I have been able to add the active actor sprite to the shop menu, with the actor sprite updating as one scrolls through their party members in the 'buy' section. I feel this adds a much desired element for ease of use for the player.
I imagine this could be further customized to have an "E" icon appear over actor sprites who already have said item equipped, and even more so add in a different pose or icon to signify if an item is an improvement or a downgrade. Kind of like the menus in Chrono Trigger.
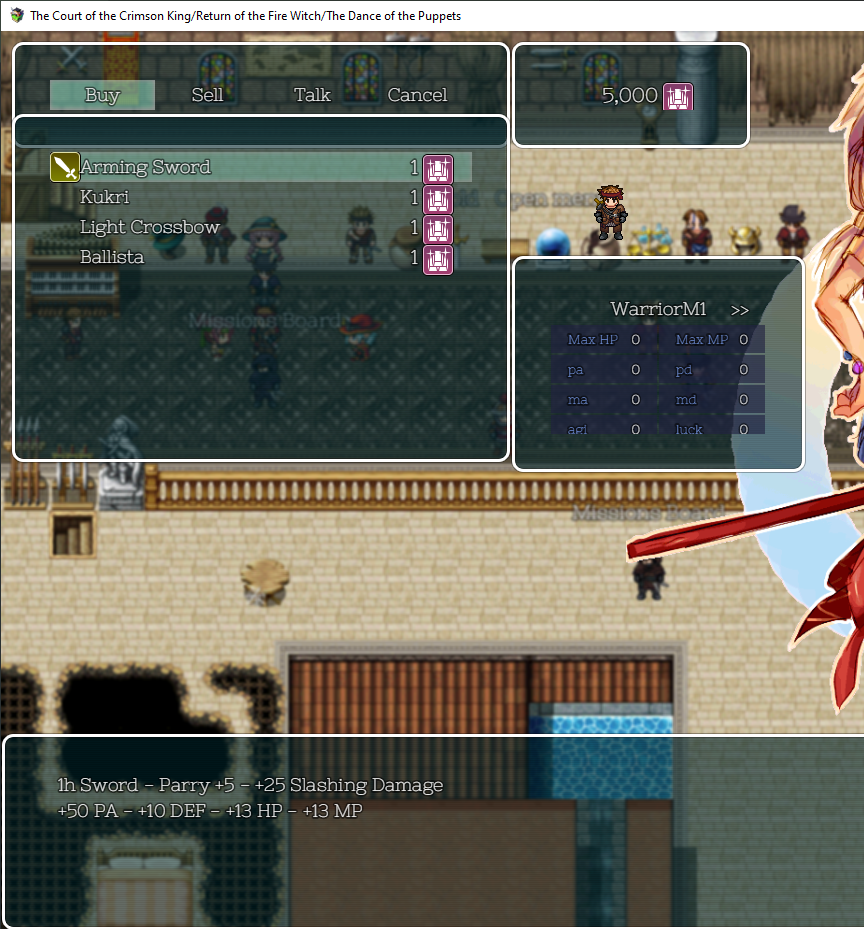
Simply add the snippet in the following code after the 'return;}' lines:
Code:Window_ShopStatus.prototype.drawEquipInfo = function(x, y) {
this.changePaintOpacity(true);
this.resetTextColor();
this.resetFontSettings();
var actor = this.statusMembers()[this._currentIndex];
var width = this.contents.width - this.textPadding()*2;
if (!actor) {
this.changePaintOpacity(false);
this.drawText(noEquipName, x, y, width, 'center');
return;
}
Code:var direction = 'down';
this.drawCharsetSprite(actor, x - "6", y - "120", direction);
This modification requires the VE_SpriteInWindows.js plugin. (
https://forums.rpgmakerweb.com/index.php?threads/ve-sprite-in-windows.61646/)
Unfortunately, I did stumble into one block when tinkering with this, and that being that the "Possession Window", when activated, displays over the Sprite instead of under it. The EquipInfo window displays underneath it, but is occupied with relevant information. I use Yanfly ItemCore and unique items, so the possession window is kind of best repurposed anyways. This is what it looks like when the window is not hidden. As you can see, the sprite is greyed out behind the window.
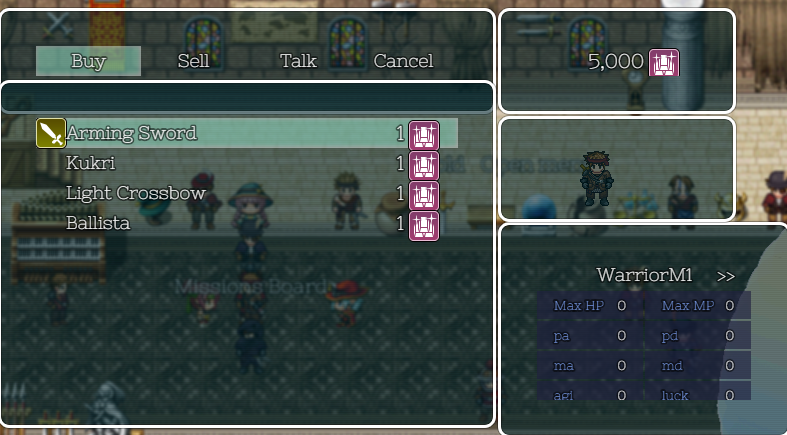
Fortunately, this also can be fixed. Simply adjust the order of the following lines in 'Scene_Shop.prototype.createStatusWindow = function() {', like so:
Code:this.addWindow(this._possessionWindow);
this.addWindow(this._statusWindow);
I originally came back to this post to ask for help about the layering, but looks like I fixed it in the process. Final result looks like so. A bit of nudging and should be perfect:
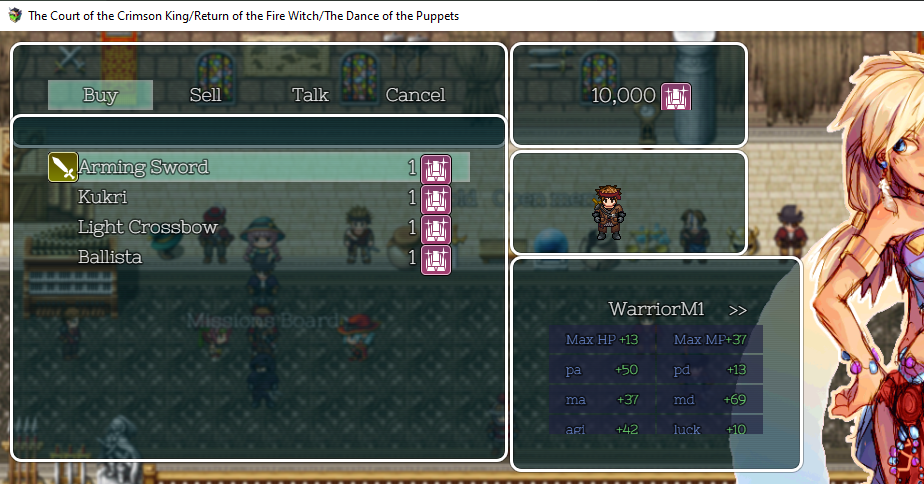
Next step is looking to see if the parameters displayed can be changed to include custom ones. Either way, I am extremely satisfied with this plugin and highly recommend it for those looking to enhance the shopping experience.