"Hobbit Shire" Tileset for MV

● ARCHIVED · READ-ONLY
Started by Kip 56 posts Page 2 of 3 View original ↗
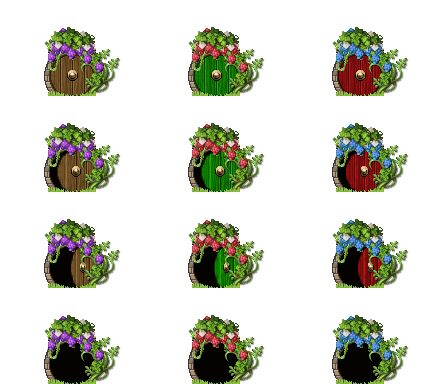
  1. I've taken the liberty of repositioning @Avery's beautiful doors for MV (first set shown).  I also tried to do the same for @GrandmaDeb's but there was a problem with the vines which don't quite line up between each frame and consequently look like they are jumping around as the door opens.  Fixing that was too difficult, so I took inspiration from them instead and created a set of my own.  There are two versions of this - one has grass along the bottom of the door so they blend better with the hobbit hills.


    content removed


    !$HobbitDoorCalamity.png!$HobbitDoorCalamityGrass1.png
  2. @Calamitous Magic I've removed the image of Avery's door as her terms specifically state not to post edits without her permission. You can contact her to find out if it would be okay to post them here for the purpose of this topic.
  3. mlogan said:
    @Calamitous Magic I've removed the image of Avery's door as her terms specifically state not to post edits without her permission. You can contact her to find out if it would be okay to post them here for the purpose of this topic.

    @mlogan Many apologies, I was responding to her suggestion in an earlier post that they could be used and I saw no restrictions mentioned in the post she linked to.  I should have looked further.  I also didn't realise that re-positioning constituted editing but I will know better now.  Sorry again, I certainly don't want to break any rules, I will be more careful in the future.
  4. Recolored and purposed a few of the barrels from my ship set. They should hopefully look okay next to the hobbit doors, or wherever. Also made a little stand to compliment the carrot patch Calamitous Magic put together. Once you have your sprites, let me know and we can put a little bunny shop keep in there. :)  


    Shireset.png


    Burrows.png
  5. @Gabrelik Ha ha, "Kerits", love it!  Did you draw that free hand?
  6. After a fashion. I drew it in Gimp. I'm attempting to paint my first tree right now. Hopefully it turns out well! :D  
  7. Good luck, I was curious because I am attempting to learn pixel art and I'm not very good at it!  I think I will have to stick to Frankentiling.   :(
  8. Honestly, I'm not very good either, but I'm practicing a lot and improving a little each time. The community tutorials have been amazing, and youtube is my best friend! Learning so much about digital art and working on things here has been so much fun. :)  
  9. I went ahead and made a few more small edits to your guy's great work to make them fit better in the tileset grid format for RPG Maker =^.^=


    Thank you SO much @Gabrelik These new fences are going to look great and the stairs are a nice touch too! I hadn't noticed that little row of pixel transfer, but I'm hoping I was able to fix it now! By the way I thought your "Kerrits" shop was absolutely adorable~ I'm sure I'll be able to find a place to put this in my game :3

    Spoiler
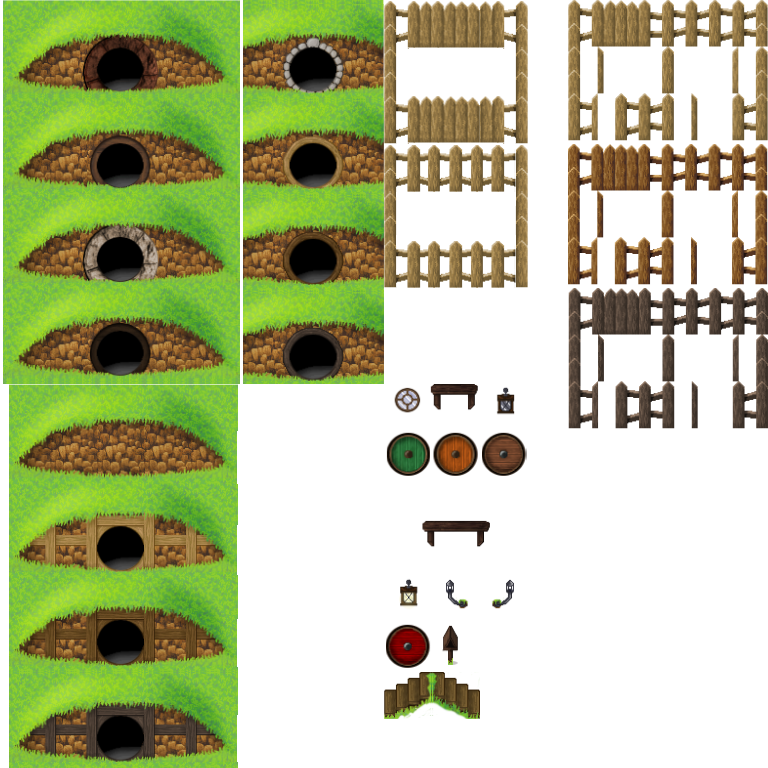
    Bunny_Burrows.png


    I'm still doing some experimenting with the fences, I don't think I've got them quite right just yet I was able to line the planks up with the tileset grid well enough but they don't mesh together perfectly when using the middle tile multiple times in a row, that and I think I'm going to have to adjust them a little bit. Right now, as you can see below, I have the planks lined up right along the edge of each tile box
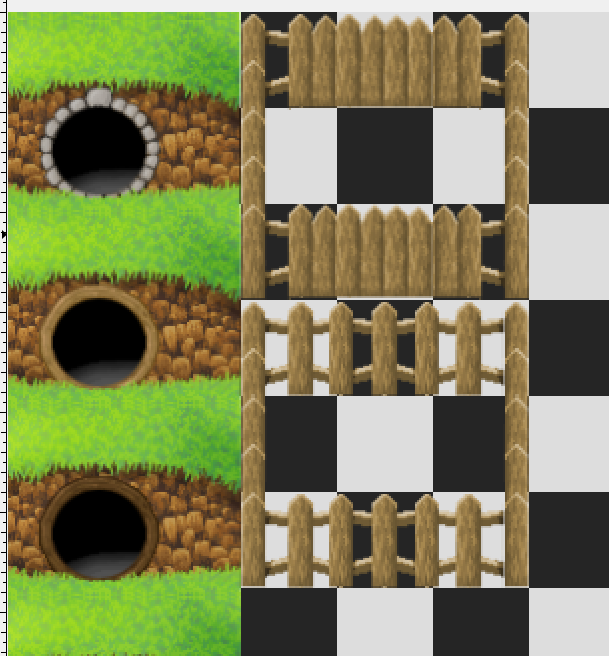

    fence example.png


    The trouble with that is that in game when you are telling RPG maker where characters can and cannot walk, there is a giant gap between where the player visually sees the fence and where they are made to stop walking. I think I might have to scoot it over to the middle of the tile so that half of the empty space is on the left and the other half is on the right. But I haven't gotten around to doing it just yet.


    And thank you too @Calamitous Magic ! You're new tileset is looking wonderful now that I scaled it up by a few pixels like you had suggested~ And those doors!? Oh my gosh, they are beautiful! They really add a very pretty touch! The vines you made look amazing! and the little bits of grass are much appreciated too <3 I was having a tough time adding that myself. I'll just share the scaled up version of your tileset here too!

    Spoiler
    Bunny_Shire.png


    @LadyBaskerville @Gabrelik @Calamitous Magic  Thank all of you SO much! Really I truly mean it, I was not expecting to really get a response from anyone when I posted this request here, and the three of you have blown me away with the content you're creating! Not to mention how quickly you've gotten so much done! You have all added more than I ever could have hoped for, and all this fresh content is really inspiring me with more and more ideas! I can't wait to see what you surprise me with next!


    One Idea that crossed my mind as I started putting things together that I thought might be interesting is having one of the little shire hills with a tree growing out of the top/side. Like imagine a massive tree, one large enough that in inside of the trunk could be hollowed out and possibly made into a "second story" for a bedroom or something like that inside the home itself. Perhaps a little window in the side of the tree? I dunno I thought the idea sounded neat ^.^;


    Anyhow, thankyouthankyouthankyou! You all have given me so much to work with when I started with nothing! All of your work looks beautiful and I can not begin to describe how grateful I am for all of this!


    You're all amazing!
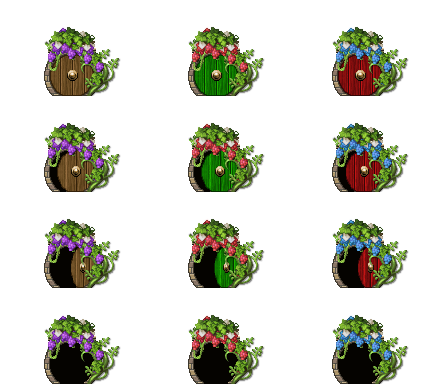
  10. You can also try this fence image, yours looks a bit blurry:


    oLSQgfJ.png


    When you download the image directly, it should already be lined up so that the fenceposts are in the middle of each tile/go across the edge of two adjacent tiles.
  11. LadyBaskerville said:
    You can also try this fence image, yours looks a bit blurry:


    oLSQgfJ.png


    When you download the image directly, it should already be lined up so that the fenceposts are in the middle of each tile/go across the edge of two adjacent tiles.


    Hmm, Maybe I've been making mistakes when copying the pictures you all have been posting ^.^; for some reason when I tried copying gabrelik's pics the way he posted them, nothing seemed to line up right in RPG maker. but you're right, your pics look much cleaner than the ones I have! 


    Should I be doing something different to save the images besides just right clicking them in the post and saving?
  12. At least for the first image he posted, try clicking it once and saving it from there. The picture you get when you save it directly seems to be a bit smaller for some reason, not sure if that might be the case with some of the others as well...
  13. haaa, good to know X3 I can't believe I didn't notice that~


    Oh well, live and learn, thanks! That explains why things weren't lining up quite right with one another then ^.^;


    Haha I think I'll be running off to bed for tonight, but I can't wait to keep messing around with all the materials you have made tomorrow! thanks again!
  14. All of these looks really good!


    I am quite partial to that kerits house. Would it also be possible to get without the text (so you can add your own)?
  15. @Canini,


    Carrotstandplain.png


    @Kip,


    Added a little sunflowery...type..thing. Not really sure what happened there. Started making leaves for a tree, and a flower sort of grew out of the middle.  :unsure:


    Shireset.png
  16. @Kip You're very welcome, I've been enjoying the challenge.  You threw me a bit with the comment about scaling up my tileset though, because it was 768 x 768 when I did it and I had been talking about @Gabrelik's set.  I admit I did wonder why that one was 750 x 750, when the separate fences and the hill with the steps both were the correct dimensions.  


    I've now had a little experiment and it seems that (at least for the larger images) if you just right click and "save image as" it is actually downloading them at the smaller size.  If you open the image in a new window and then save it, however, it downloads it at the correct size.  I cannot fathom why this is the case, but I suggest you re-save them all this way and then you won't have lost any detail or sharpness by resizing (which you do even though It's only changing by 18 pixels either way).  I have just done this with Gabrelik's and it is much better even though I sharpened up the original when I resized.  It is probably best to save anything this way from now on just to be on the safe side!  
  17. Calamitous Magic said:
    @Kip You're very welcome, I've been enjoying the challenge.  You threw me a bit with the comment about scaling up my tileset though, because it was 768 x 768 when I did it and I had been talking about @Gabrelik's set.  I admit I did wonder why that one was 750 x 750, when the separate fences and the hill with the steps both were the correct dimensions.  


    I've now had a little experiment and it seems that (at least for the larger images) if you just right click and "save image as" it is actually downloading them at the smaller size.  If you open the image in a new window and then save it, however, it downloads it at the correct size.  I cannot fathom why this is the case, but I suggest you re-save them all this way and then you won't have lost any detail or sharpness by resizing (which you do even though It's only changing by 18 pixels either way).  I have just done this with Gabrelik's and it is much better even though I sharpened up the original when I resized.  It is probably best to save anything this way from now on just to be on the safe side!  


    So I've now discovered that all the time I've been spending tediously resizing everything you guys have been posting and aligning them to a grid was tooootally wasted XD I can't believe I made sucha silly mistake! hahaha oh well, I just tested the pictures after saving everyone's tilesets from a new tab and they all work beautifully! Much sharper and smoother looking than what I had before! hahaha I can't help but laugh at myself, I kept wondering how @Gabrelik was making that little example village of his when none of his tiles were matching up with RPG maker right X3 I assumed he just put it together in photoshop! 
  18. @Gabrelik Thank you so much!
  19. Kip said:
    So I've now discovered that all the time I've been spending tediously resizing everything you guys have been posting and aligning them to a grid was tooootally wasted XD I can't believe I made sucha silly mistake! hahaha oh well, I just tested the pictures after saving everyone's tilesets from a new tab and they all work beautifully! Much sharper and smoother looking than what I had before! hahaha I can't help but laugh at myself, I kept wondering how @Gabrelik was making that little example village of his when none of his tiles were matching up with RPG maker right X3 I assumed he just put it together in photoshop! 


    Don't beat yourself up too much - I did exactly the same thing so we can laugh at each other!  Anyway, we know better now.  Meanwhile, I had a bash at doing a tree for you.  It sits over the top of the hobbit holes.  I drew the trunk, and the window and the rest is from the RTP.  If you really want a nice big tree though, you should get hold of some of Celianna's - they're beautiful.  Still, I'm modestly pleased with this as a first effort.


    RabbitShireTreeCalamity.png
  20. Calamitous Magic, that tree looks awesome! I've been practicing with Celianna's tutorial, trying to make something that will work for what Kip is asking. I have a few rough drafts on the trees using this method, but I think it will take a decent amount of practice to get it down before I can start looking at adding the window, etc:


    Firsttree.pngTree2.pngTree2leafless.png


    Also looking at PandaMaru's style for her nature set. Might be fun to try making something similar. Have you seen those, @Kip?


    Maru's Stuff


    She is wonderful, and there are some excellent nature tiles in there that might work for your project.