Hi everyone,
I have recently taught myself to parallax and after a bit of encouragement I have decided to do a tutorial on the way I make my parallax maps. This I my first tutorial ever so bear with me and let me know what you think ok :D
This tutorial is about the making of a parallax map, focusing on the way I put the map together, It will not show you how to implement parallax map in your project. I have done the tutorial hoping people who will look at it already know how to implement a parallax map and are looking at tips on how to make them.
If people enjoy and find this tutorial use full, And feel the need a tutorial on it I will quite happily do one on how to implement the maps in to a project using scripts.
Requirements
Photoshop
Patience
Time
And a basic knowledge of Rpg Maker VX Ace
And some awesome resources :D
Credit CELIANNA for the tiles I have used
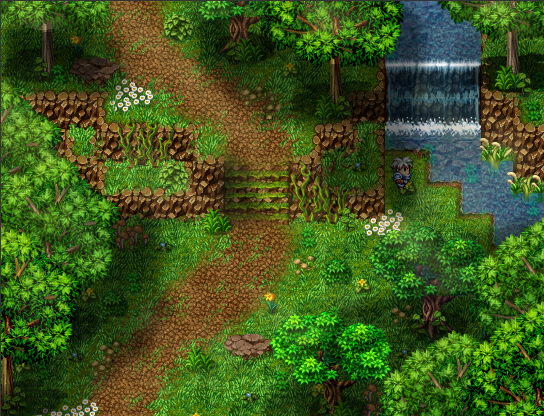
Ok so this is a in game screen of the map I am going to show you to make. Il go in to detail on what I have done, why and what tips I have learnt along the way :D
Spoiler
The First Step
The way in which I do my maps is to first make a base . I do that in the editor, and I do that for several reasons.
The first reason is because even though a parallax map allows you to break the grid, it takes a lot of work with scripts and events to get the collisions accurate. So seen as you are restrained by pass ability I find it easier to use the editor.
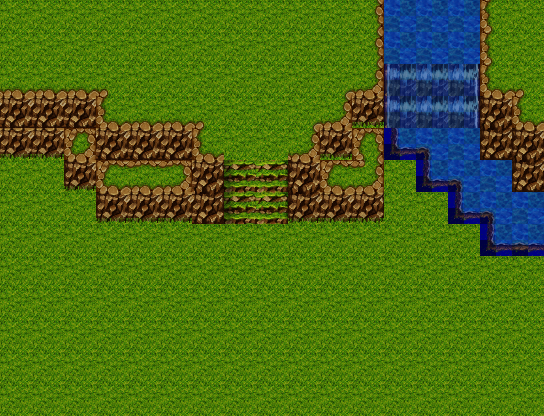
The second reason is the water placement. So first create a map in the editor, making note of the width and height, and draw out the basic layout of the map.
Spoiler
Spoiler

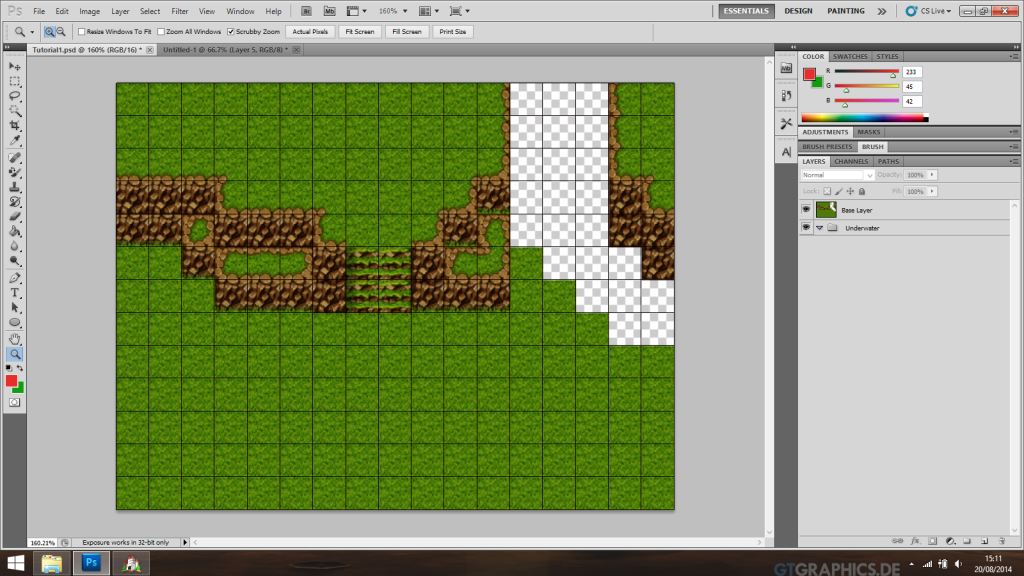
Once the new page is open , go to the edit tab and scroll down to the preferences, Select guides grid and slices and set the grid size to 32. That way the grid will match up to an individual tile from the editor :D
Now take a print screen of the editor and paste it in to photoshop, lining up the map so it fits the new page. Once you have done that the next step is to do some work on the water, first what we need to do it to edit out the funny bit where the edge is.
Spoiler
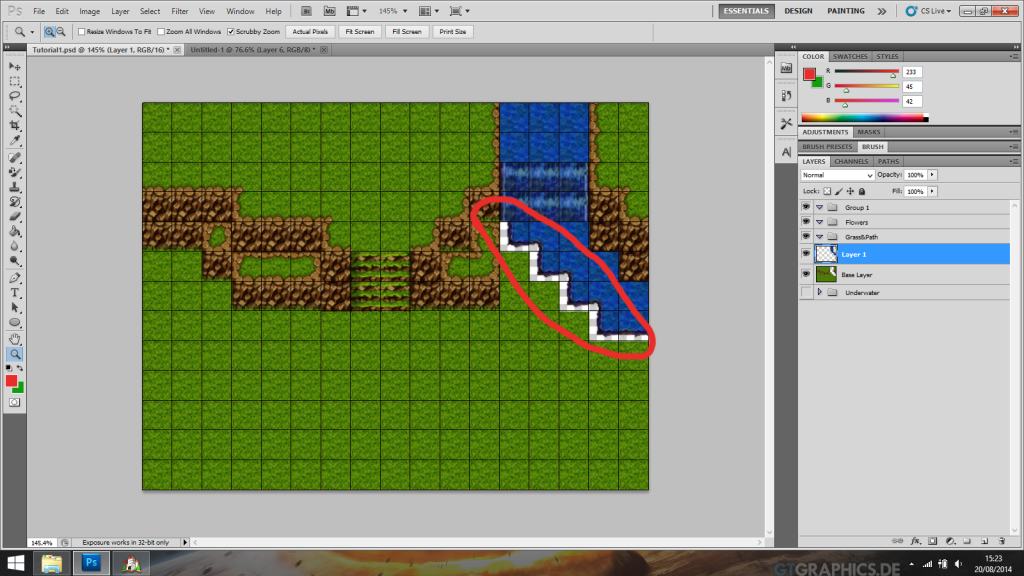
Now what we need to do is select the water that is left and cop it to a new layer deleting it from the rest of the base layout.
Spoiler

So before we move to the next step their is a few things we need to do.
first I find it use full to create folders for the different aspects of the map. It also makes it easier to create the finished back and overlay later on.
It is down to preference what folders you create, personally I think about what the final layers will show so base and overlay.
The important ones are :
Trees Upper Layer
Trees lower layer
Flowers/base details
Grass/path
Underwater/water edge
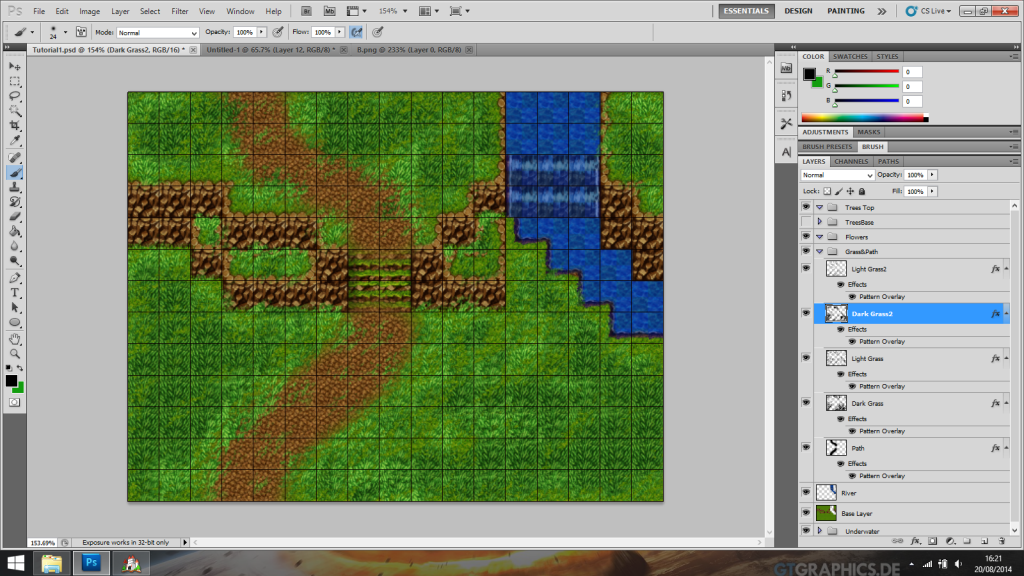
The next thing we need to do is create some patters that we will be using to create the path and grass effects.
To do this you open up the A2 tile set in to photoshop, and highlight the middle of the grass auto tile
Spoiler

Now you have a new pattern :D go through the different grasses and paths creating patterns for each so that you can use the in the map and in future maps.
So now we have patterns we need to use them.
First thing first head to your grass/path folder and create a new layer called path/ Select a normal brush of about a 64 size the colour black and draw in the path. Don't worry the path wont stay back lol.
What we do now is to go in to the layer options and overlay the path pattern on the layer. To do that right click on the layer and select blending options. Select the tab pattern overlay in the menu and change the pattern to the one you created of the path
Spoiler
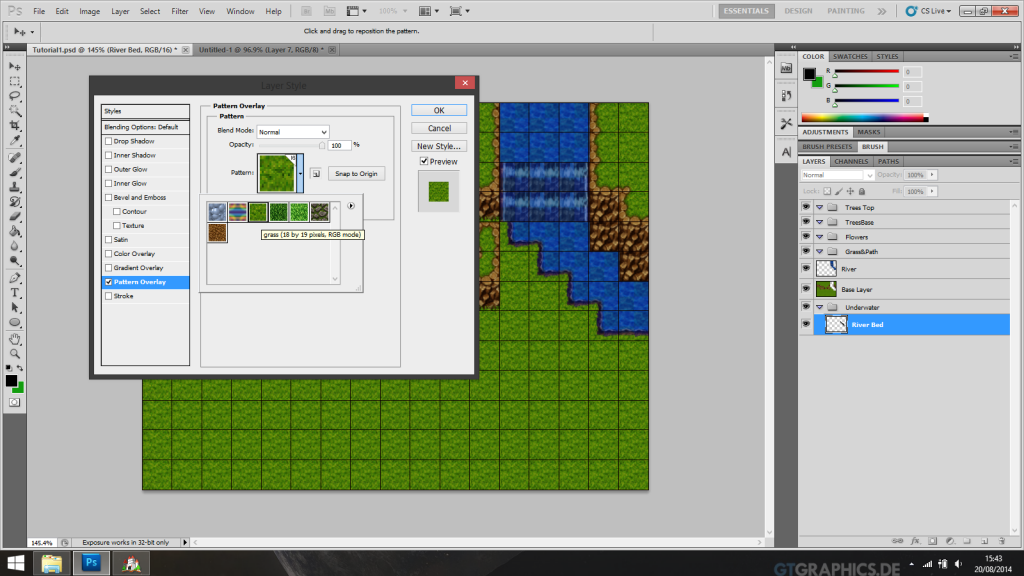
So now you should have a nice path base.
Next we need to do the grass, To do this we need to select a few options in the brush tool.
First create a layer above the path called grass, then select a brush of about 130 size and go in to the brush settings. What were doing here is trying to give the grass some authentic look and texture so we are going to select a few options.
First select the airbrush tick box and the texture tick box. If you are using a graphics tablet its use full to select transfer and set it to pen pressure.
Spoiler

Spoiler
So open up a B/C/D/E tile with forest resources and get copying and pasting flowers and other forest stuff in. But so not add and trees yet. for now focus on the other stuff. And of course staying organised helps so stick them in the flower group you made :D
Spoiler

Things are starting to build up now so its time to add the trees.
In the Tree base group we made start copying and pasting trees in. Keep in mind again the areas in what the character can and cannot walk. Also if you want the trees to have flowers or something at their base add them in as well.
Tips : Use a variety of slight colour changes to the trees, not all trees are the same colour, And using different sized trees will make the map look more natural.
Spoiler

So as the base layer for a parallax will be technically under the editor, it gives us the opportunity to put things in the water. The water tiles were edited in the A1 tile set from earlier so that they were slightly transparent, So when in the editor anything on the parallax base layer will look as if it is underwater. So lets fill in the funny edge, maybe create some dirt on the bottom and a few rocks and things using the patterns from before.
Also what we can do is create things sticking out of the water. We do this by adding some things on to the map overlay we will create later.
So deselect all the layers accept the base so that you can clearly see where the edges of the water will be compared to the rest of the map and with out distraction form the other things in the map.
And get creative aha :D
Spoiler

Here is the method behind my madness.
On the layer that will be on the base, or under water. I have erased all the parts of the reeds that I want to look like they are poking out of the water. Leaving me with the funny looking objects in the picture.
the copy layer of the reeds what we want to do is erase the bits we want underwater, I found the best way to do this for the top later is to delete most of the bottom then select the blur tool to slightly blurr the bottoms so it looks like they blend in to the water.
I will highlight exactly what I have done for the top layer(Overlay) in a screen later in the tutorial when we go over making the top layer of the trees for the player to walk under :D
So lets do that shall we.
What we do now is make a copy of the tree layer/layers. I find its easier to combine all the tree layers once you are happy with the placements. It also makes it easier for you to duplicate all the trees at once.
So with the duplication of the trees layer in the upper tree group we can make the next move. De select the tree layer in the lower tree group so we only have the one in view. Then we need to erase all the tree trucks where the player will not be walking under. In other words erase anything that the player will not be able to walk over.
It is this layer we should combine with the copy of the reeds, So the top bits we want to stick out of the water.
Spoiler

So were almost there now. :D
What we do now is select the underwater group, the grass and path, the flowers and the trees and take a look , if your happy congratulations you have just made the base layer or first parallax. Save the file as a png in to the parallax folder of your project.
Spoiler

So the top of the trees and the reed layer highlighted before in the screen. That right their is the overlay. All that's left is to select just those groups again and save the file in to the pictures folder of your project :D
Well that completes the tutorial. In the screen shot of the finished map there is light and shadow, which if this tutorial actually helps people I will either edit the thread or create a new one where I add the shadows and any light effects as well.
PS: Always make sure you note down where you are getting the resources you use and the people who have made them. CREDIT!! MUST BE MADE to the people who have spend their hard earned time giving us the awesome resources that allow is to make parallax maps.
Thanks everyone
MonkeyInTartan