[embedded media]
Synopsis
Spoiler
"I need to know the truth. What happened to him. What happened to them."
It's been a year since a strange event took place at Aerscam Mansion, a place now forgotten by time. Dorothy, a curious and persistent girl, wants to know the truth behind the mysteries surrounding this place. She decides to stay there for five days, but as soon as she arrives, a letter warns her that she's not alone, and her presence is not welcome. It seems that the mansion is haunted by old spirits who want revenge. Can she survive until 6AM?
Every night at 12AM, and for six hours (6 minutes in real life), Dorothy will have to defend herself against the attacks of vengeful spirits. She can't escape, but she can keep track of her enemies by using a strange artifact that allows her to see every other room in the mansion, and by using candles and lights to keep them away. If one of those spirits gets into her room and Dorothy manages to resist their attack, her level of fear will increase, reducing her chances of surviving subsequent attacks. "Five Nights: Aerscam Mansion" was inspired by the FNAF series, however, it has a new story, characters and game mechanics.
Estimated Length: ~1 hour (main story) ; ~3 hours (main story + challenges).
I recommend playing with a mouse and stereo headphones.
It's been a year since a strange event took place at Aerscam Mansion, a place now forgotten by time. Dorothy, a curious and persistent girl, wants to know the truth behind the mysteries surrounding this place. She decides to stay there for five days, but as soon as she arrives, a letter warns her that she's not alone, and her presence is not welcome. It seems that the mansion is haunted by old spirits who want revenge. Can she survive until 6AM?
Every night at 12AM, and for six hours (6 minutes in real life), Dorothy will have to defend herself against the attacks of vengeful spirits. She can't escape, but she can keep track of her enemies by using a strange artifact that allows her to see every other room in the mansion, and by using candles and lights to keep them away. If one of those spirits gets into her room and Dorothy manages to resist their attack, her level of fear will increase, reducing her chances of surviving subsequent attacks. "Five Nights: Aerscam Mansion" was inspired by the FNAF series, however, it has a new story, characters and game mechanics.
Estimated Length: ~1 hour (main story) ; ~3 hours (main story + challenges).
I recommend playing with a mouse and stereo headphones.
Spoiler
Dorothy, the main character.
She's a perseverant teenager that goes to the mansion with one objective: to know the truth, even if it requires to face multiple, vengeful souls.
She tries to be a strong person, however, her greatest fears can play against her during the nights, making her uncontrollable.
Frederick Aerscam
He's an enigmatic man who used to be the owner of the Aerscam Mansion.
No one knows his whereabouts after his disappearance during 2015, a year before Dorothy decides to investigate those strange events.
The "souls".
Vengeful spirits that seem to be trapped in the mansion.
What are their motives...? How and why did they die...? What keeps them trapped...?
Spoiler
"Five Nights: Aerscam Mansion" has the following game mechanics.

Nights and Hours.
This game contains multiple nights of varying difficulty. In each one of these nights, a new enemy will become "active" and will try to kill you. Every night lasts six minutes in real life.
Even if the title says "Five Nights", after the fifth one you'll be presented with a mode called "Nightmare": an extra night where most of your enemies will be incredibly aggressive.

The Observation Zone.
This is where most of the game takes place. The Observation Zone is a room connected to the rest of the mansion by two hallways that can be illuminated with the use of the lamps next to them. It also has a strange artifact that lets Dorothy see the entire mansion and defend herself against the souls that attack her.

The Artifact.
A strange artifact that looks like a monitor. It lets you see the entire mansion without moving, allowing you to make strategies to avoid the enemies and survive the nights. By clicking on the buttons you can change the room. It will get corrupted for some seconds every time an enemy moves or when an enemy is in the room you're watching.

Audio Cues.
Being aware of audio cues is essential in this game. Heavy breathing, loud footsteps or distant screams may indicate the movement of some enemies. Music also changes according to the presence of multiple souls or how close they are to you.

Fear Scenes.
Some enemies have the ability to induce hallucinations in Dorothy's mind once they get into the room. This is called a "Fear Scene". You have to click on Dorothy's shaking silhouette at the right of the screen to calm her down, otherwise, she will lose her control and will get killed by the enemies.
Every Fear Scene increases Dorothy's Fear Meter.

Fear Meter.
Dorothy's level of fear can be checked with the fear meter. It increases not only with Fear Scenes, as some actions done by enemies can increase it too.
A high level of fear makes it harder to survive Fear Scenes, and tints the screen red.

Souls and Aggressiveness.
Every soul that attacks you in this game has a different routine, like moving randomly or in a fixed way. Some of them move fast and some others move slowly, some of them can induce Fear Scenes and some others can not.
As the nights go on, their level of aggressiveness will increase, making them more difficult to avoid while the game becomes more difficult.

Flashbacks.
After every night you'll be rewarded with a Flashback: an scene where the past events of the mansion are revealed. This will give you the answers to the unsolved mysteries the mansion has.

Custom Night Mode.
After finishing the "Nightmare" mode, you'll be rewarded with the Custom Night Mode, where you can play eight new challenges with fixed aggressiveness levels for every enemy, or make custom ones by adjusting the aggressiveness of every enemy, from 0 to 10, the way you want it.

Extra Menu.
After finishing the "Nightmare" mode, you'll be also rewarded with the Extra Menu, where you can see the enemies of the game, watch their jumpscares, replay scenes, and check some other content and guides too.
Nights and Hours.
This game contains multiple nights of varying difficulty. In each one of these nights, a new enemy will become "active" and will try to kill you. Every night lasts six minutes in real life.
Even if the title says "Five Nights", after the fifth one you'll be presented with a mode called "Nightmare": an extra night where most of your enemies will be incredibly aggressive.
The Observation Zone.
This is where most of the game takes place. The Observation Zone is a room connected to the rest of the mansion by two hallways that can be illuminated with the use of the lamps next to them. It also has a strange artifact that lets Dorothy see the entire mansion and defend herself against the souls that attack her.
The Artifact.
A strange artifact that looks like a monitor. It lets you see the entire mansion without moving, allowing you to make strategies to avoid the enemies and survive the nights. By clicking on the buttons you can change the room. It will get corrupted for some seconds every time an enemy moves or when an enemy is in the room you're watching.
Audio Cues.
Being aware of audio cues is essential in this game. Heavy breathing, loud footsteps or distant screams may indicate the movement of some enemies. Music also changes according to the presence of multiple souls or how close they are to you.
Fear Scenes.
Some enemies have the ability to induce hallucinations in Dorothy's mind once they get into the room. This is called a "Fear Scene". You have to click on Dorothy's shaking silhouette at the right of the screen to calm her down, otherwise, she will lose her control and will get killed by the enemies.
Every Fear Scene increases Dorothy's Fear Meter.
Fear Meter.
Dorothy's level of fear can be checked with the fear meter. It increases not only with Fear Scenes, as some actions done by enemies can increase it too.
A high level of fear makes it harder to survive Fear Scenes, and tints the screen red.
Souls and Aggressiveness.
Every soul that attacks you in this game has a different routine, like moving randomly or in a fixed way. Some of them move fast and some others move slowly, some of them can induce Fear Scenes and some others can not.
As the nights go on, their level of aggressiveness will increase, making them more difficult to avoid while the game becomes more difficult.
Flashbacks.
After every night you'll be rewarded with a Flashback: an scene where the past events of the mansion are revealed. This will give you the answers to the unsolved mysteries the mansion has.
Custom Night Mode.
After finishing the "Nightmare" mode, you'll be rewarded with the Custom Night Mode, where you can play eight new challenges with fixed aggressiveness levels for every enemy, or make custom ones by adjusting the aggressiveness of every enemy, from 0 to 10, the way you want it.
Extra Menu.
After finishing the "Nightmare" mode, you'll be also rewarded with the Extra Menu, where you can see the enemies of the game, watch their jumpscares, replay scenes, and check some other content and guides too.
Spoiler
Spoiler
Every enemy in "Five Nights: Aerscam Mansion" has a different attack pattern.
You can unlock this information after finishing Nightmare Mode (Night 6), or read it here if you prefer so.
01 - ???
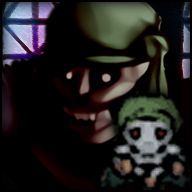
"Scare him and he'll go away, but not for too long."
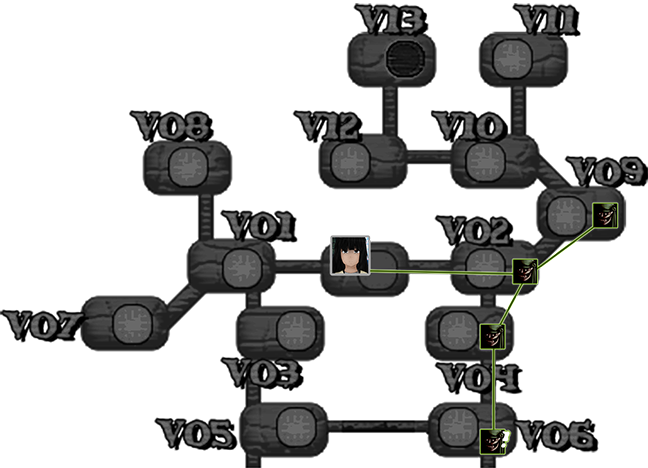
01 - Panic
Appears every night.
Visits rooms 06, 04, 02, 09, and the Observation Zone Right Hall.
Panic's movement is random at the start. At higher aggressiveness levels he'll take less detours and move faster. When you hear his breath or see him in the right hall, use the lamp and he might go away. Otherwise, he will start a fear scene.
02 - ???
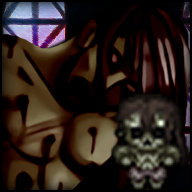
"Scare him and he'll go away, but not for too long."
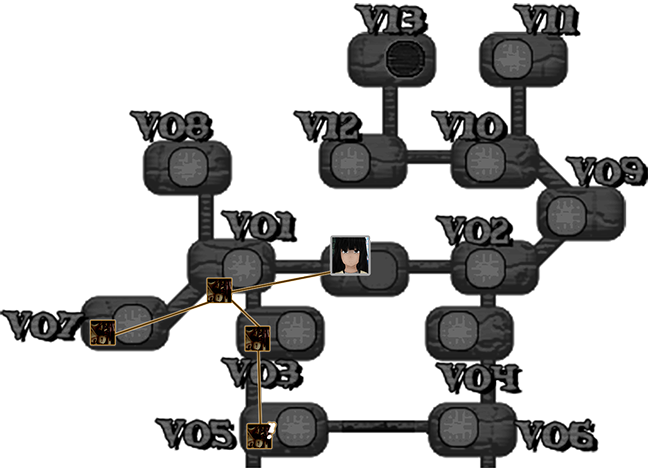
02 - Corpse
Appears every night.
Visits rooms 05, 03, 01, 07, and the Observation Zone Left Hall.
Corpse's movement is random at the start. At higher aggressiveness levels he'll take less detours and move faster. When you hear his breath or see him in the left hall, use the lamp and he might go away. Otherwise, he will start a fear scene.
03 - ???
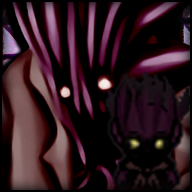
"When he finds you, don't try to find him."
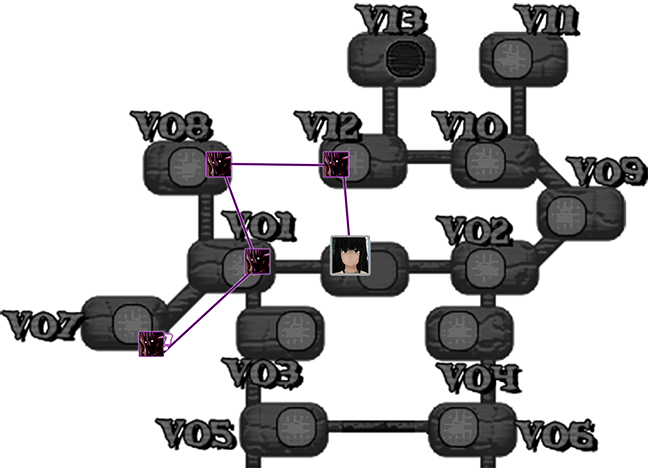
03 - Paranoia
Appears on nights 2 to 6.
Visits rooms 07, 01, 08, 12, and the Observation Zone Ceiling.
Paranoia's movement is random if his aggressiveness is under five, otherwise, he'll follow a fixed pattern to reach you. When he reaches and darkens your room, don't use the artifact until he goes away, or he will kill you instantly.
04 - ???
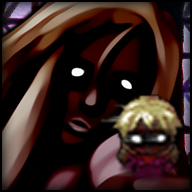
"Feeling scared will make her attack."
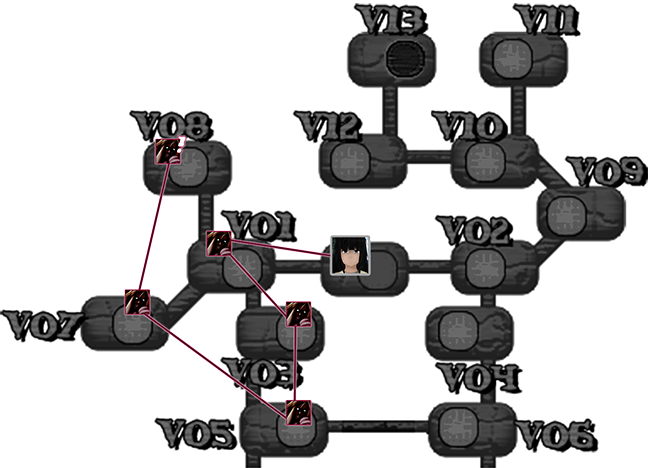
04 - Anxiety
Appears on nights 3 to 6.
Visits rooms 08, 07, 05, 03, 01 and the Observation Zone Left Hall.
Has a fast and fixed movement route. When she reaches the left hall, indicated by loud, distorted footsteps, don't use the lamp on her and don't use the artifact at all: wait for her to go away. Otherwise, either a fear scene will occur or she will instantly kill you.
05 - ???
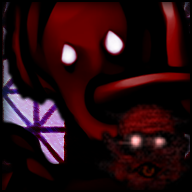
"Feeling scared will make him attack."
05 - Scream
Appears on nights 3 to 6.
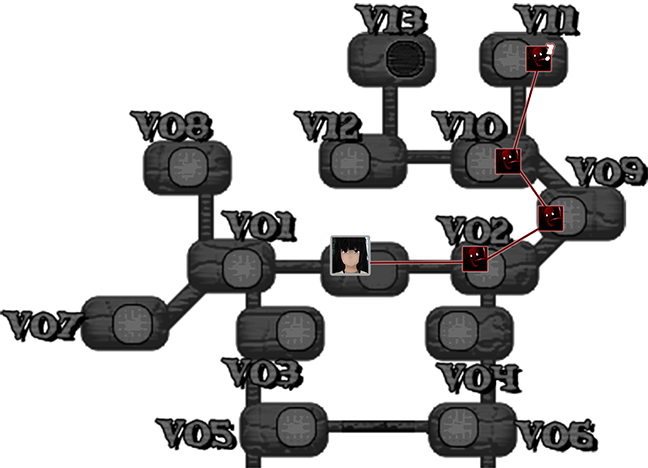
Visits rooms 11, 10, 09, 02 and the Observation Zone Right Hall.
Has a slow and fixed movement route. When he reaches the right hall, indicated by loud, distorted footsteps, don't use the lamp on him and don't use the artifact at all: wait for him to go away. Otherwise, either a fear scene will occur or he will instantly kill you.
06 - ???
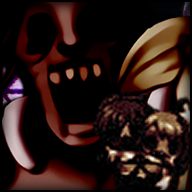
"Observed, they'll wait. Forgotten, they'll attack."
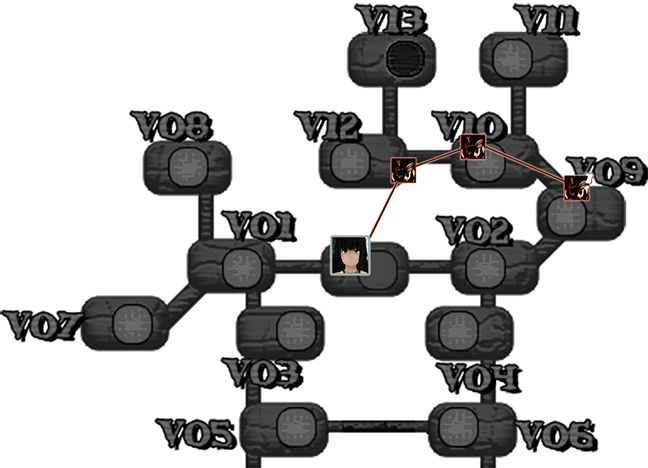
06 - Specter
Appears on nights 4 to 6.
Visits rooms 09, 10 and 12.
Observe them with the artifact for a while: this will make them scream and retreat to room 09. If you ignore them for too long, they'll eventually reach the Observation Zone, and instantly kill you. They can kill even if you're under the attack of another enemy.
07 - ???
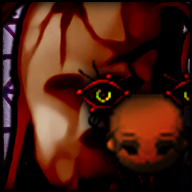
"His soul screams, searches for what was his. Suffers."
07 - Illusion
Appears on nights 5 to 6.
Visits room 12, corrupts rooms 01, 02 and 13.
When he "comes back", determined by his aggressiveness level, check room 12 immediately to make him disappear. Do not check rooms 13, 01 or 02, otherwise he'll make the artifact useless. You won't have too much time to stop him from killing you.
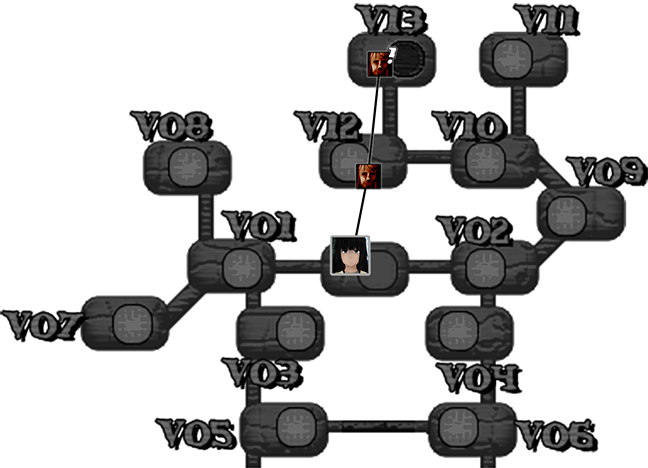
Full Movement Guide (includes all enemies)
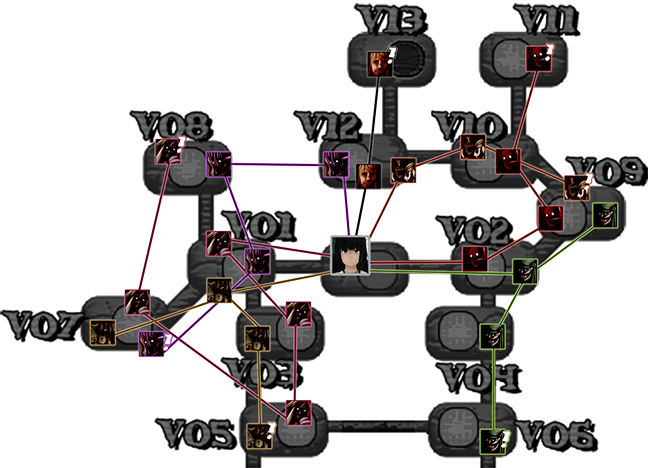
Aggressiveness Table (includes all enemies)
You can unlock this information after finishing Nightmare Mode (Night 6), or read it here if you prefer so.
01 - ???
"Scare him and he'll go away, but not for too long."
01 - Panic
Appears every night.
Visits rooms 06, 04, 02, 09, and the Observation Zone Right Hall.
Panic's movement is random at the start. At higher aggressiveness levels he'll take less detours and move faster. When you hear his breath or see him in the right hall, use the lamp and he might go away. Otherwise, he will start a fear scene.
02 - ???
"Scare him and he'll go away, but not for too long."
02 - Corpse
Appears every night.
Visits rooms 05, 03, 01, 07, and the Observation Zone Left Hall.
Corpse's movement is random at the start. At higher aggressiveness levels he'll take less detours and move faster. When you hear his breath or see him in the left hall, use the lamp and he might go away. Otherwise, he will start a fear scene.
03 - ???
"When he finds you, don't try to find him."
03 - Paranoia
Appears on nights 2 to 6.
Visits rooms 07, 01, 08, 12, and the Observation Zone Ceiling.
Paranoia's movement is random if his aggressiveness is under five, otherwise, he'll follow a fixed pattern to reach you. When he reaches and darkens your room, don't use the artifact until he goes away, or he will kill you instantly.
04 - ???
"Feeling scared will make her attack."
04 - Anxiety
Appears on nights 3 to 6.
Visits rooms 08, 07, 05, 03, 01 and the Observation Zone Left Hall.
Has a fast and fixed movement route. When she reaches the left hall, indicated by loud, distorted footsteps, don't use the lamp on her and don't use the artifact at all: wait for her to go away. Otherwise, either a fear scene will occur or she will instantly kill you.
05 - ???
"Feeling scared will make him attack."
05 - Scream
Appears on nights 3 to 6.
Visits rooms 11, 10, 09, 02 and the Observation Zone Right Hall.
Has a slow and fixed movement route. When he reaches the right hall, indicated by loud, distorted footsteps, don't use the lamp on him and don't use the artifact at all: wait for him to go away. Otherwise, either a fear scene will occur or he will instantly kill you.
06 - ???
"Observed, they'll wait. Forgotten, they'll attack."
06 - Specter
Appears on nights 4 to 6.
Visits rooms 09, 10 and 12.
Observe them with the artifact for a while: this will make them scream and retreat to room 09. If you ignore them for too long, they'll eventually reach the Observation Zone, and instantly kill you. They can kill even if you're under the attack of another enemy.
07 - ???
"His soul screams, searches for what was his. Suffers."
07 - Illusion
Appears on nights 5 to 6.
Visits room 12, corrupts rooms 01, 02 and 13.
When he "comes back", determined by his aggressiveness level, check room 12 immediately to make him disappear. Do not check rooms 13, 01 or 02, otherwise he'll make the artifact useless. You won't have too much time to stop him from killing you.
Full Movement Guide (includes all enemies)
Aggressiveness Table (includes all enemies)
Spoiler
Hope you like it! Notify me if you find a bug or leave a comment if you want!
Post last updated: June 14th, 2026.
Since this forum is closing this year, downloads, future updates and content will be posted on rpgmaker.net, itch.io and gamejolt.
Thanks, RPG Maker Web Forums, for the amazing support and resources that have helped me and others over the years!


